
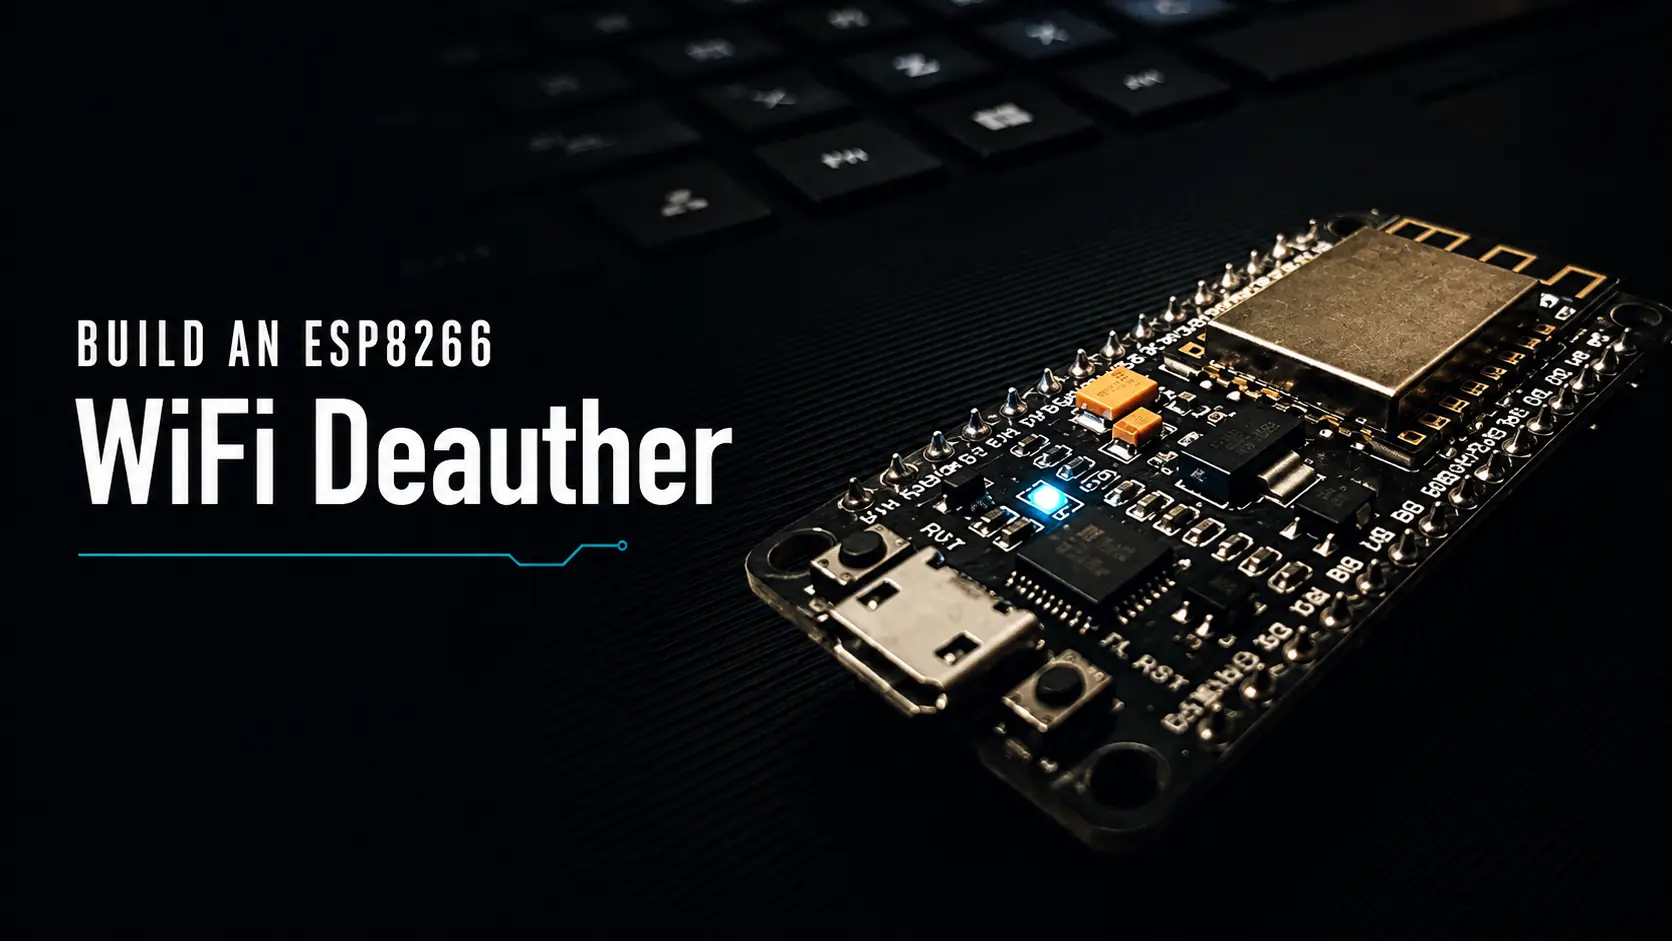
Introduction:
A wifi deauther is a small device or a software that sends fake disconnect packages/signals to the access point. These signals called as deauthentication frames. There are plenty of products available in the market when it comes to wifi deauther. One of the easy and cheap DYI model for wifi deauther is esp8266_deauther which can be create with minimum requirements like a esp8266 nodemcu module which less than $5. Well it have a different deauther models like a watch model, that will requires a display and battery etc. For the first trail, I will suggest to try the simple esp8266 wifi deauther which follow the steps below.
Build an ESP8266 WiFi Deauther:
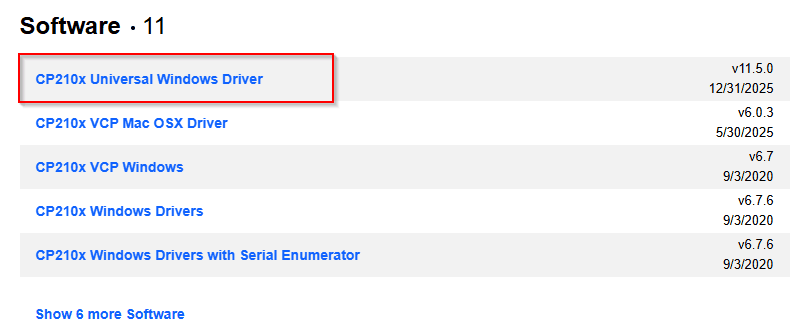
First make sure to download and install Arduino IDE as the installation process required it. Also install the drivers given below, which is very important to detect the hardware.
https://www.silabs.com/software-and-tools/usb-to-uart-bridge-vcp-drivers?tab=downloads
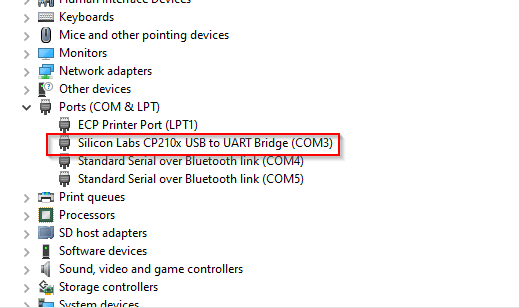
Check the device manager to make sure that esp8266 nodemcu board is detected without any issue.
Download and extract https://github.com/SpacehuhnTech/esp8266_deauther/archive/v2.zip and open the esp8266_deauther.ino file into arduino ide.
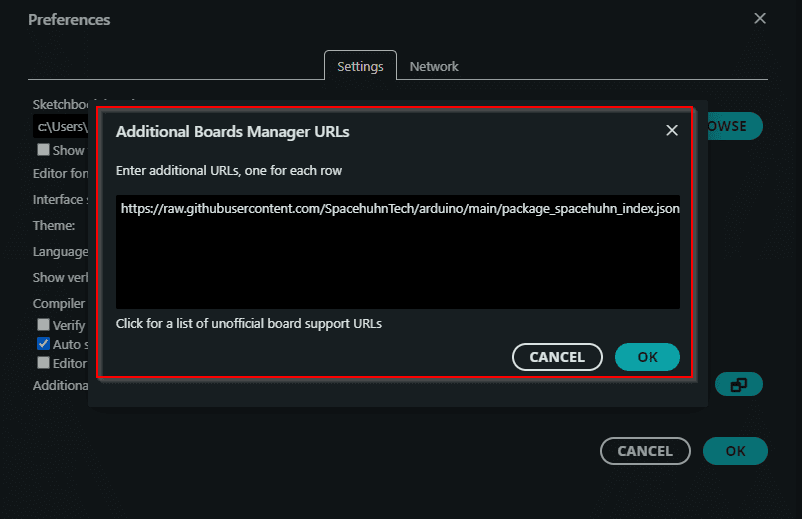
Then navigate to File -> Preferences -> Additional Boards Manager Urls and add the url as shown in the picture below.
https://raw.githubusercontent.com/SpacehuhnTech/arduino/main/package_spacehuhn_index.json
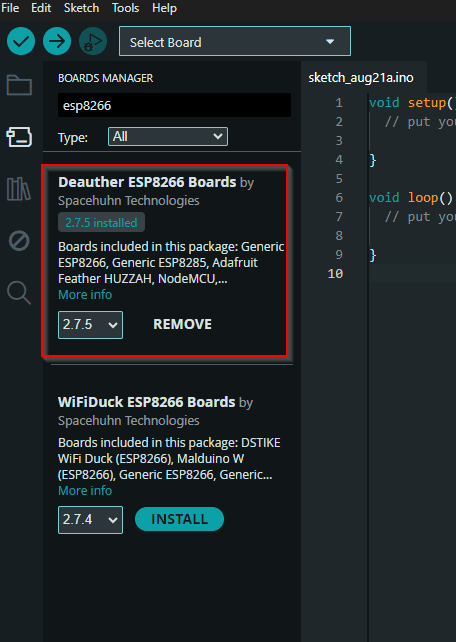
Now, navigate to Tools -> Board -> Boards Manger and search for esp8266 or deauther and install Deauther ESP8266 Boards.
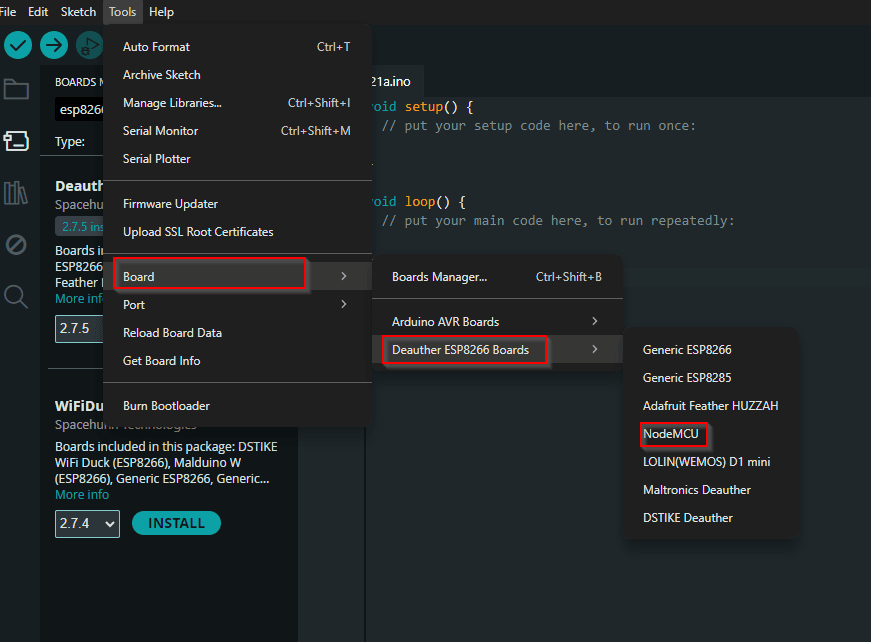
Select board by navigating to the Tools -> Board -> Deauther ESP8266 Boards -> NodeMCU
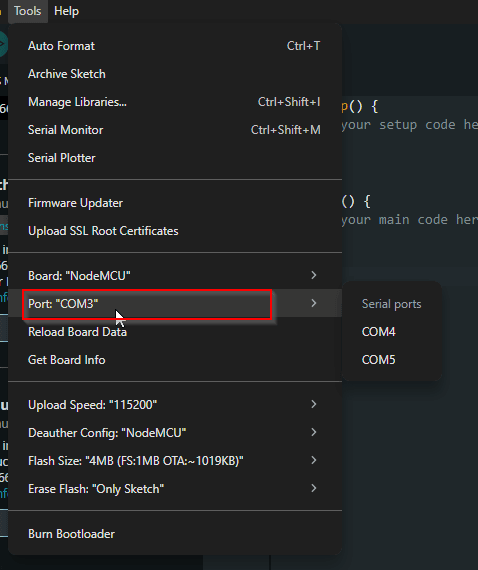
Plugin the hardware and select the correct COM port by navigating to Tools -> Port
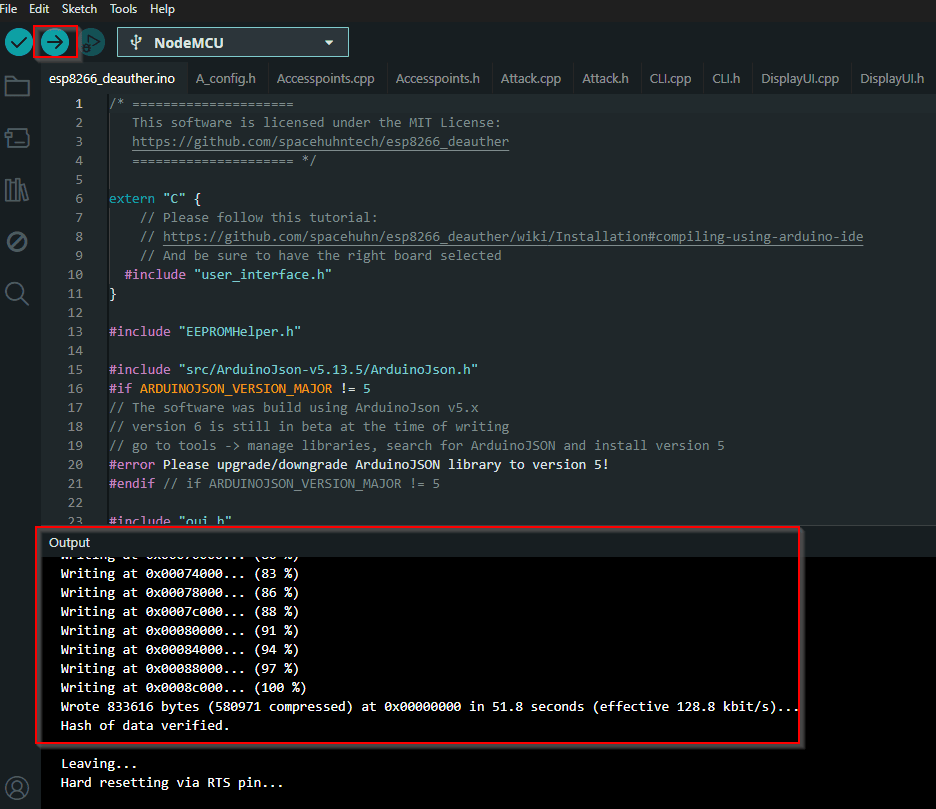
Press upload and wait until it finish the writing/installation as per the below picture.
Demo Time:
After successful installation, power the esp8266 board via laptop or as it’s a portable device better to use power bank. Check for the access point or wifi ssid name pwned connect it with password deauther
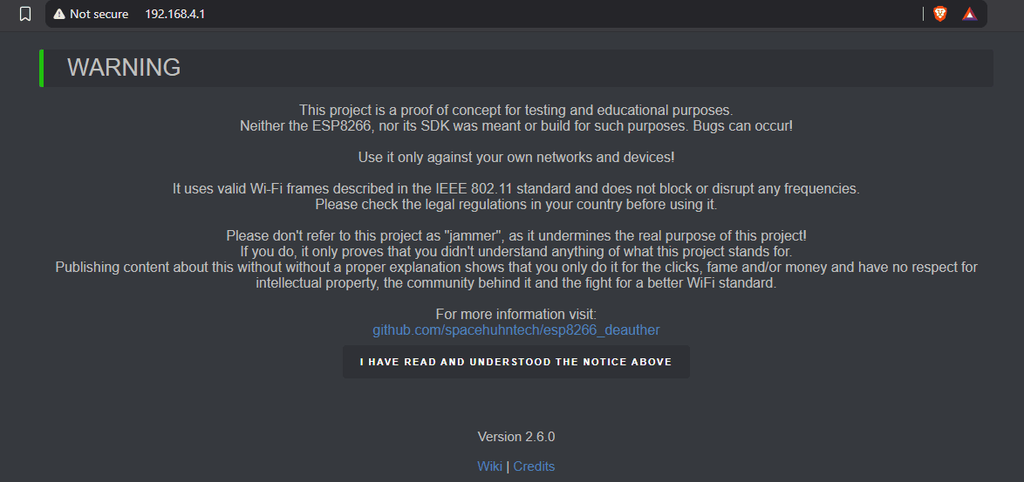
Open http://192.168.4.1 address in the browser and it will show the page shown below.
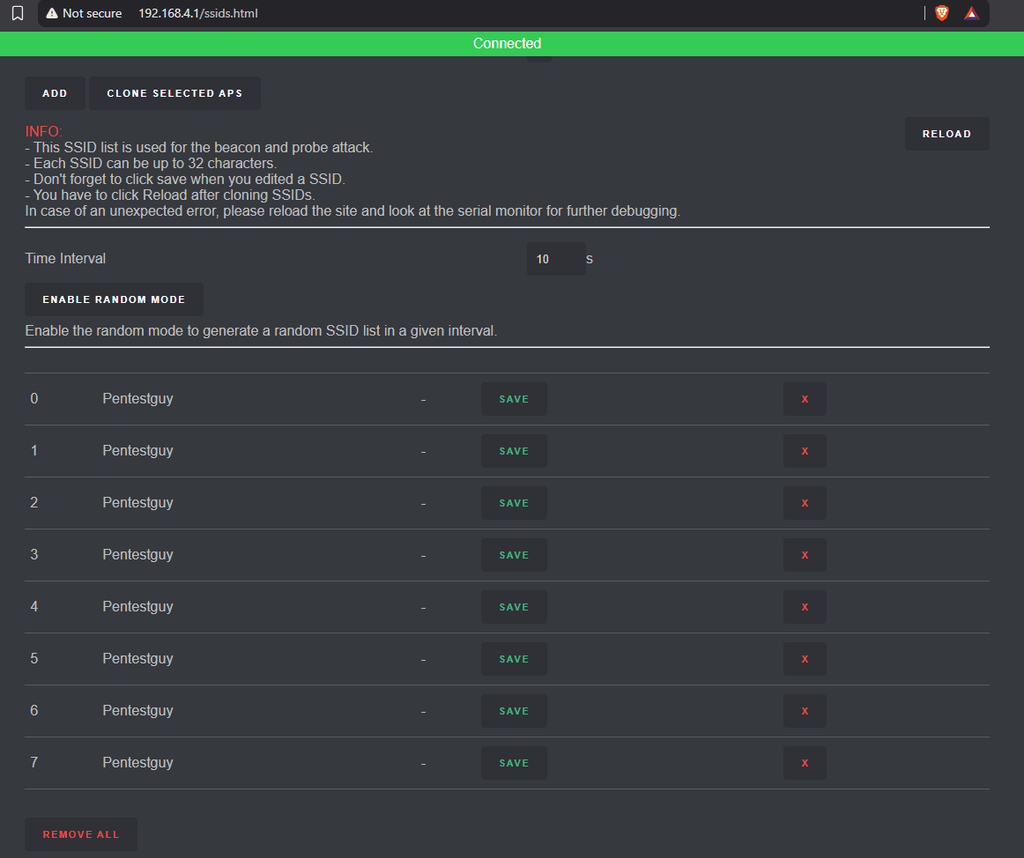
Below picture from SSIDs section, renamed all the ssids to targeted access point to confused the targeted users.
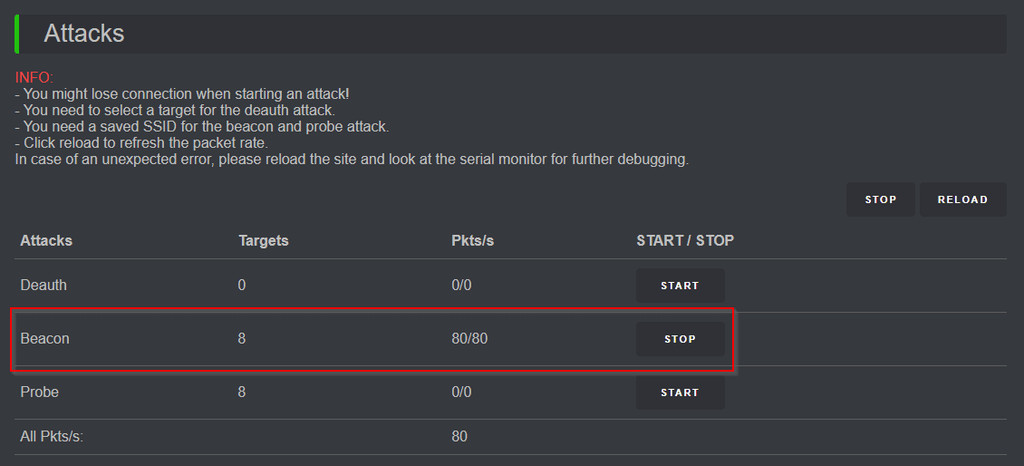
Now, start the Beacon attack under Attacks section.
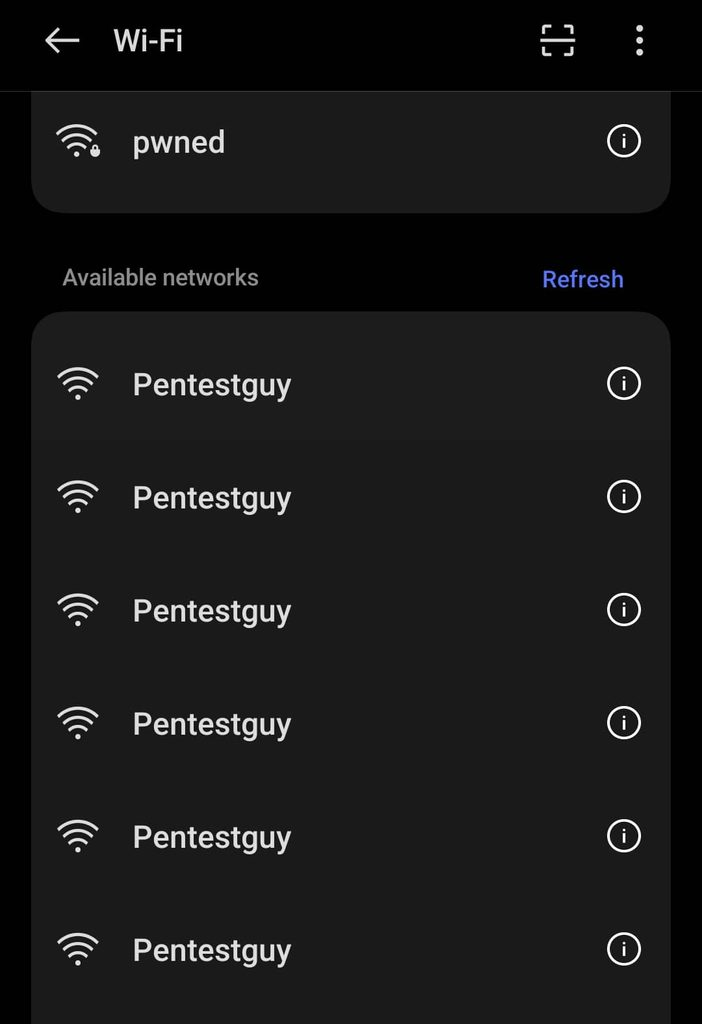
And see the below picture as expected, it shown up 8 ssids named Pentestguy.
Conclusion:
This is how anyone can setup and use the ESP8266 WiFi Deauther for different attacks like deauth, beacon or probe. Please note that this website don’t encourage to perform any unauthorized work or any illegal activities. Want to collaborate on real-world testing, tool development, or writing? Reach out via the Collaboration page. Thank you!!

